The Townie
By Rachel Davies

We’ve all heard of the cronut (although I have yet to taste one), but have you tried a duffin or a townie? I have to admit, I hadn’t heard of either until I had a request to teach a townie for a private class, by a client more current on baking trends than I am.
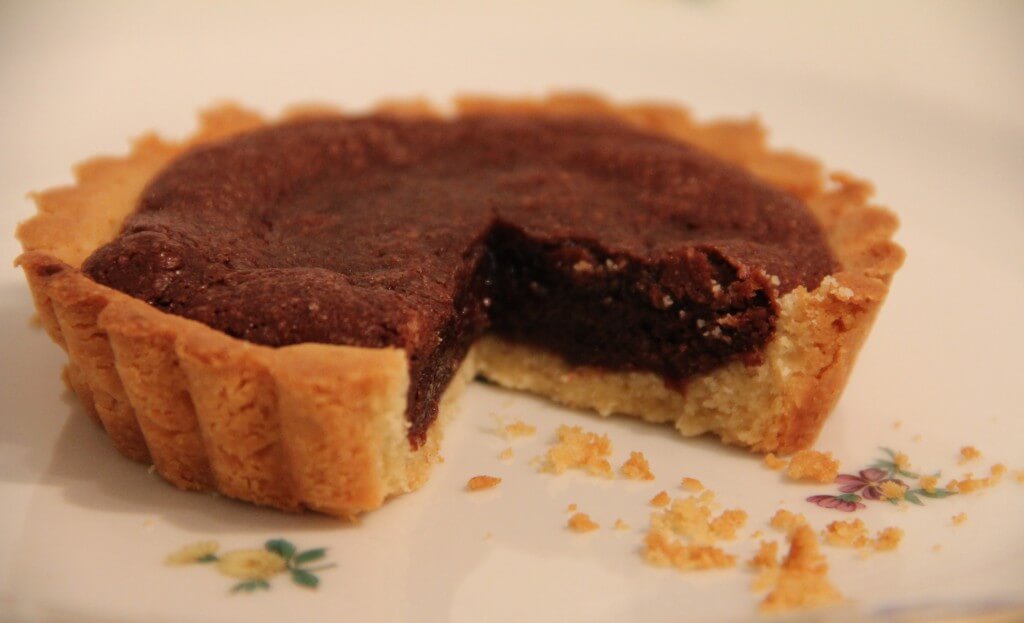
Townies, which Google reveals to be brownie tarts, were started by Bea’s of Bloomsbury, and the recipe remains a closely guarded secret. Having recipe tested my own version of townies using my favourite pastry and brownie recipes combined, I declare them wonderful!


Brownies are one of the easiest things you can bake, and this does detract from the ‘mix, bake, serve’ process by adding pastry and blind baking, but the results are so fantastic that I think it’s worth it.
What can go wrong with flaky pastry and gooey brownie combined? Exactly…
So give these a go and you will not only wow your friends with your baking, but also on your up to the minute finger on the baking pulse trendiness. Go!


Chocolate Orange Townies
Makes 10
Ingredients
For the pastry
250g plain flour
200g butter, slightly softened, cut into small pieces
100g icing sugar, sifted
Pinch of salt
2 egg yolks
For the filling
140g dark chocolate, roughly chopped
120g unsalted butter
200g caster sugar
90g plain flour
2 eggs
Zest of 1 orange
Mini tart tins, 10cm diameter
Method
- For the pastry, heap the flour on the work surface and make a large well in the centre. Place the butter, icing sugar and salt in the well, and cream the three ingredients together with your fingertips.
- Add the egg yolks and delicately work them in with your fingertips.
- Bit by bit, draw the flour into the centre and rub the mixture between your fingertips until the dough comes together. Knead 3 or 4 times until completely smooth, then roll into a ball, wrap with clingfilm and rest in the fridge for at least 10 minutes.
- On a lightly floured work surface, roll out the dough to 3mm thickness, and cut out rounds slightly larger than the tart tin diameter. Place the rounds into the tart tin, and press the dough gently into the tin. Roll over the edge with a rolling pin to trim the excess pastry. If you have time, rest for 20 minutes in the fridge.
- Preheat oven to 180˚C.
- Prick the pastry bases with a fork, and line with baking paper and baking beans. Bake for 5-10 minutes, making sure that the edges don’t colour too quickly.
- Remove the paper and baking beans, being careful as they will be hot, and bake for another 5 minutes, or until the base is lightly golden.
- Meanwhile for the filling, place the chocolate and butter in a heatproof bowl over a saucepan of simmering water (do not let the base of the bowl touch the water). Leave until melted and smooth.
- Remove from the heat. Add the sugar, flour and orange zest and stir until well mixed. Then stir in the eggs with the orange zest, and mix until thick and smooth.
- Pour the filling into the tart shells, and bake for 5 minutes at 180˚C. Reduce the heat to 140˚C and bake for a further 5 minutes, or until flaky on the top and soft in the centre.
- Leave to cool in the tins before turning them out and serving with whipped cream…

Want to learn how to make more delicious food? Sign up to Rachel’s classes or to the Rachel’s Kitchen newsletter.